> ## Documentation Index
> Fetch the complete documentation index at: https://nango-marcin-nan-6306-mcp-tool-connections-get.mintlify.site/llms.txt
> Use this file to discover all available pages before exploring further.
# Emarsys (Ouath) - How do I link my account?
# Overview
To authenticate with Emarsys (Ouath), you need two key pieces of information:
1. **Client ID** - A unique identifier for your client.
2. **Client Secret** - A confidential key used to authenticate the identity of the application (client).
This guide will walk you through obtaining these credentials within Emarsys.
### Prerequisites:
* You must have an account with Emarsys.
* You must be an account owner to create new API credentials.
### Instructions:
#### Step 1: Requesting API credentials
1. Login to your **Emarsys account**.
2. Naviagate to **Management > Security Settings**.
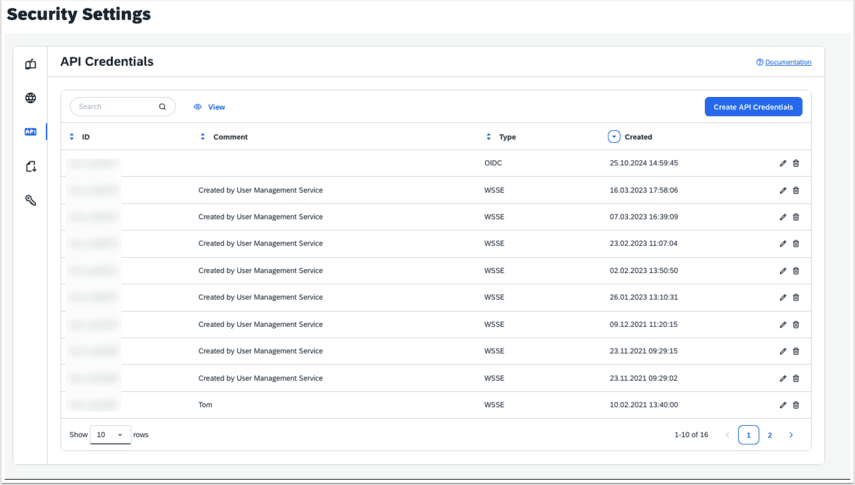 3. Under **Security Settings**, click on the **Create API Credentials** button, then click on **OpenID Connect** button on the **Create API Credentials** modal
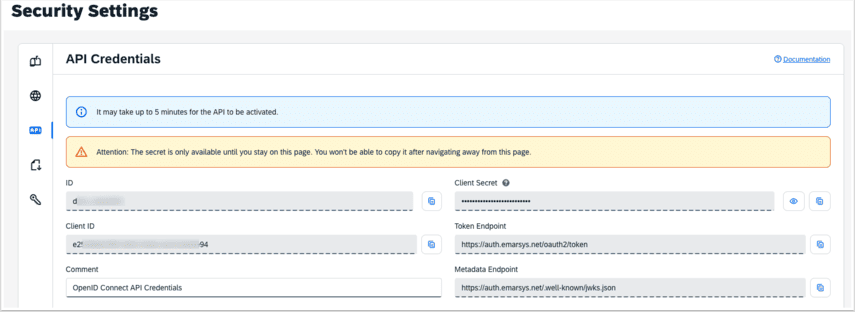
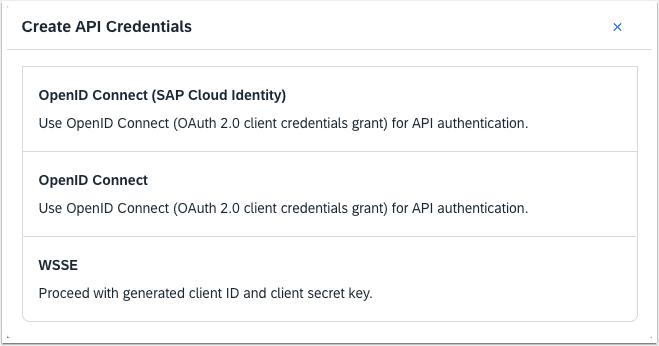 * By selecting the **OpenID Connect** option, API credentials are created with OpenID Connect authentication, using OAuth 2.0 and JSON Web Token (JWT) technologies.
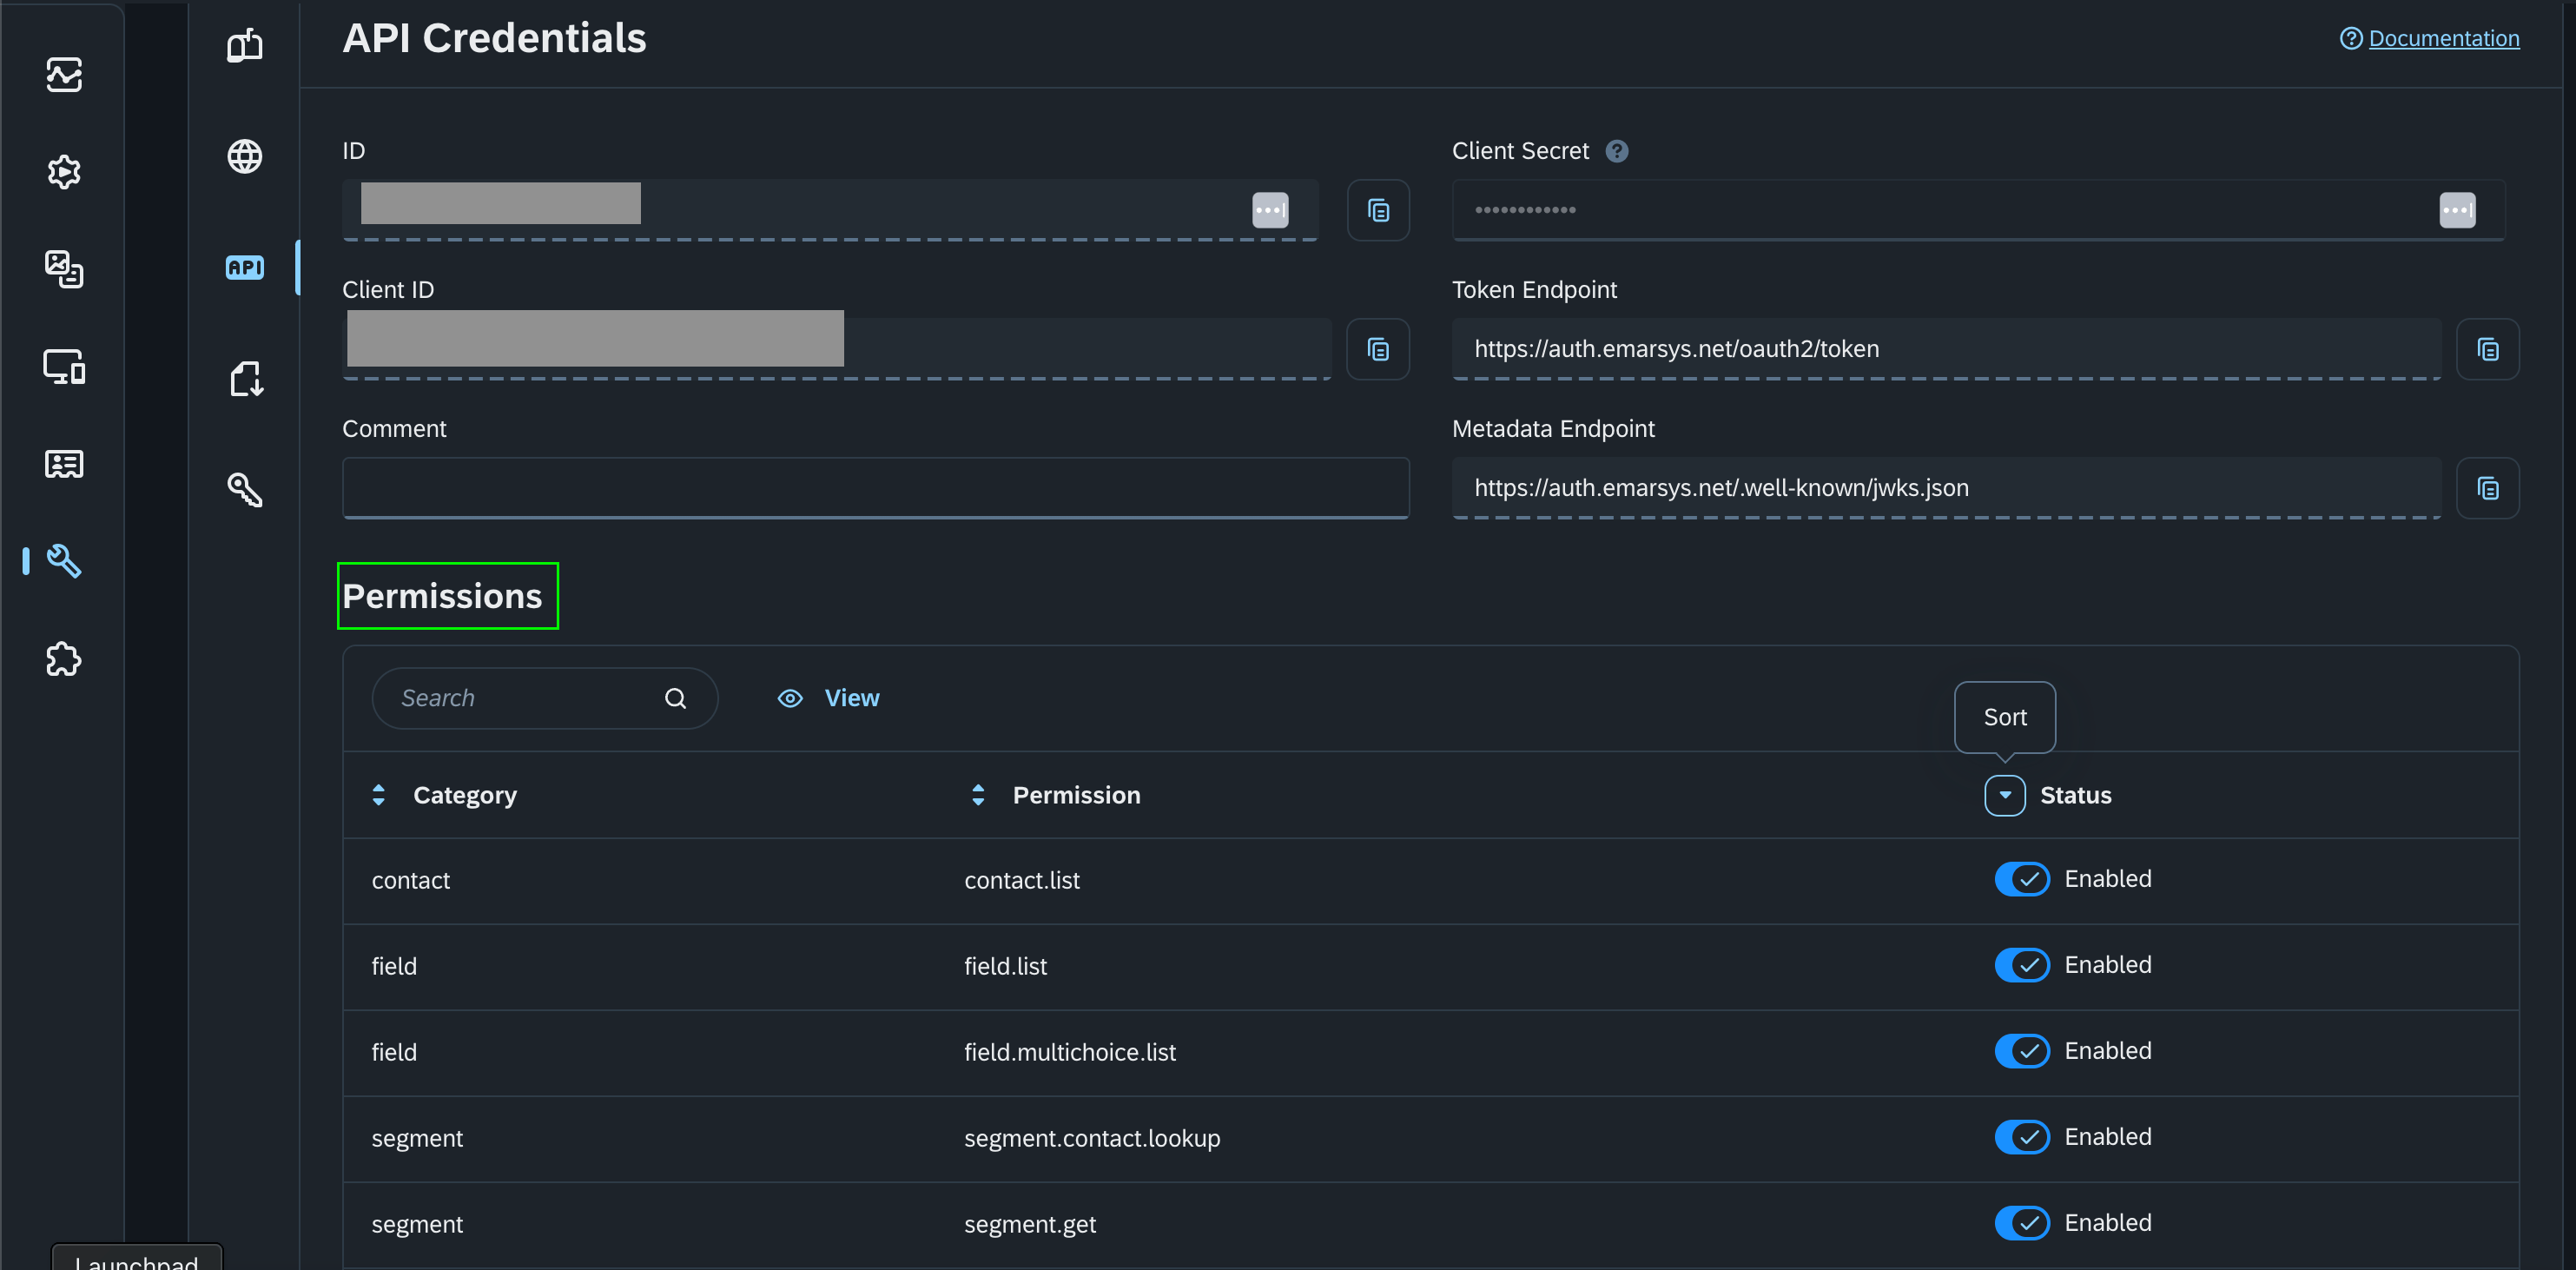
 * You also need to grant permissions by enabling the status to the specific permission in the permissions table, within the **API Credentials** page of the created **API Credentials**.
 #### Step 2: Enter credentials in the Connect UI
Once you have both the **Client ID** and **Client Secret**:
1. Open the form where you need to authenticate with Emarsys (Ouath).
2. Enter the **Client ID** and **Client Secret** in their designated fields.
3. Submit the form, and you should be successfully authenticated.
#### Step 2: Enter credentials in the Connect UI
Once you have both the **Client ID** and **Client Secret**:
1. Open the form where you need to authenticate with Emarsys (Ouath).
2. Enter the **Client ID** and **Client Secret** in their designated fields.
3. Submit the form, and you should be successfully authenticated.
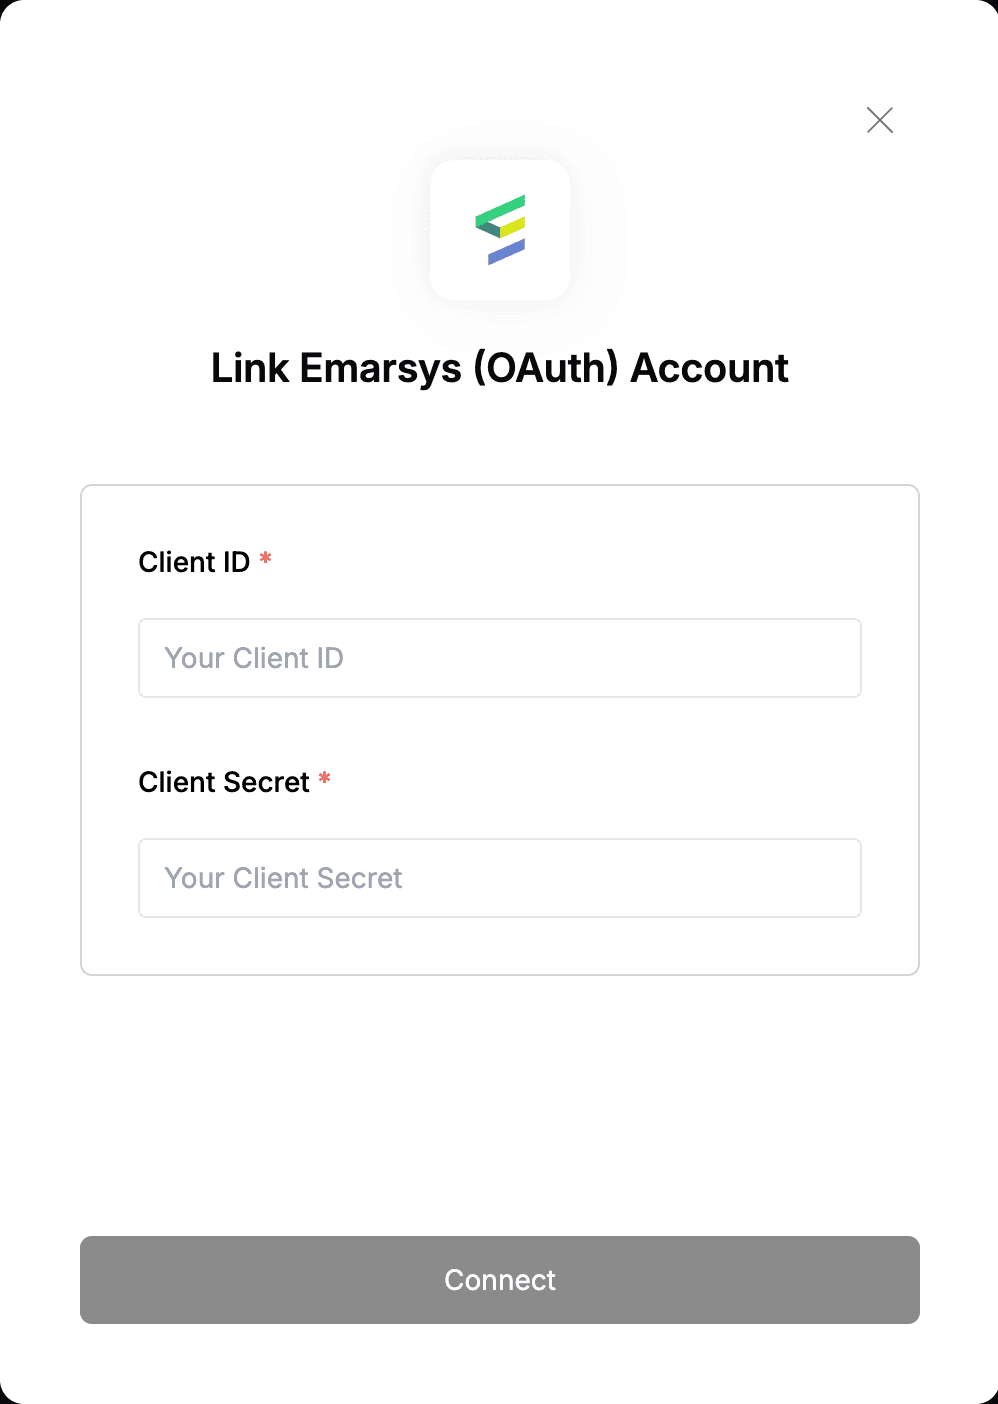 You are now connected to Emarsys (Ouath).