> ## Documentation Index
> Fetch the complete documentation index at: https://nango-marcin-nan-6306-mcp-tool-connections-get.mintlify.site/llms.txt
> Use this file to discover all available pages before exploring further.
# Microsoft (Client Credentials) - How do I link my account?
# Overview
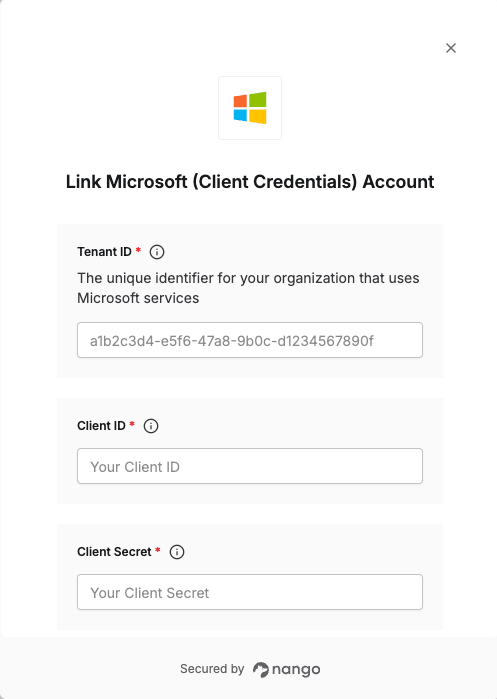
To connect Microsoft (Client Credentials) in Nango, you need to provide:
1. **Tenant ID** — The unique identifier for your organization that uses Microsoft services.
2. **Client ID** — The unique identifier that Azure assigns to your application when it's registered.
3. **Client Secret** — A unique string that enables the client application to access Microsoft.
This guide will walk you through generating and finding these credentials within Azure.
### Prerequisites
* You must have an active Azure account with the appropriate Microsoft product subscription.
### Step 1: Finding your Tenant ID
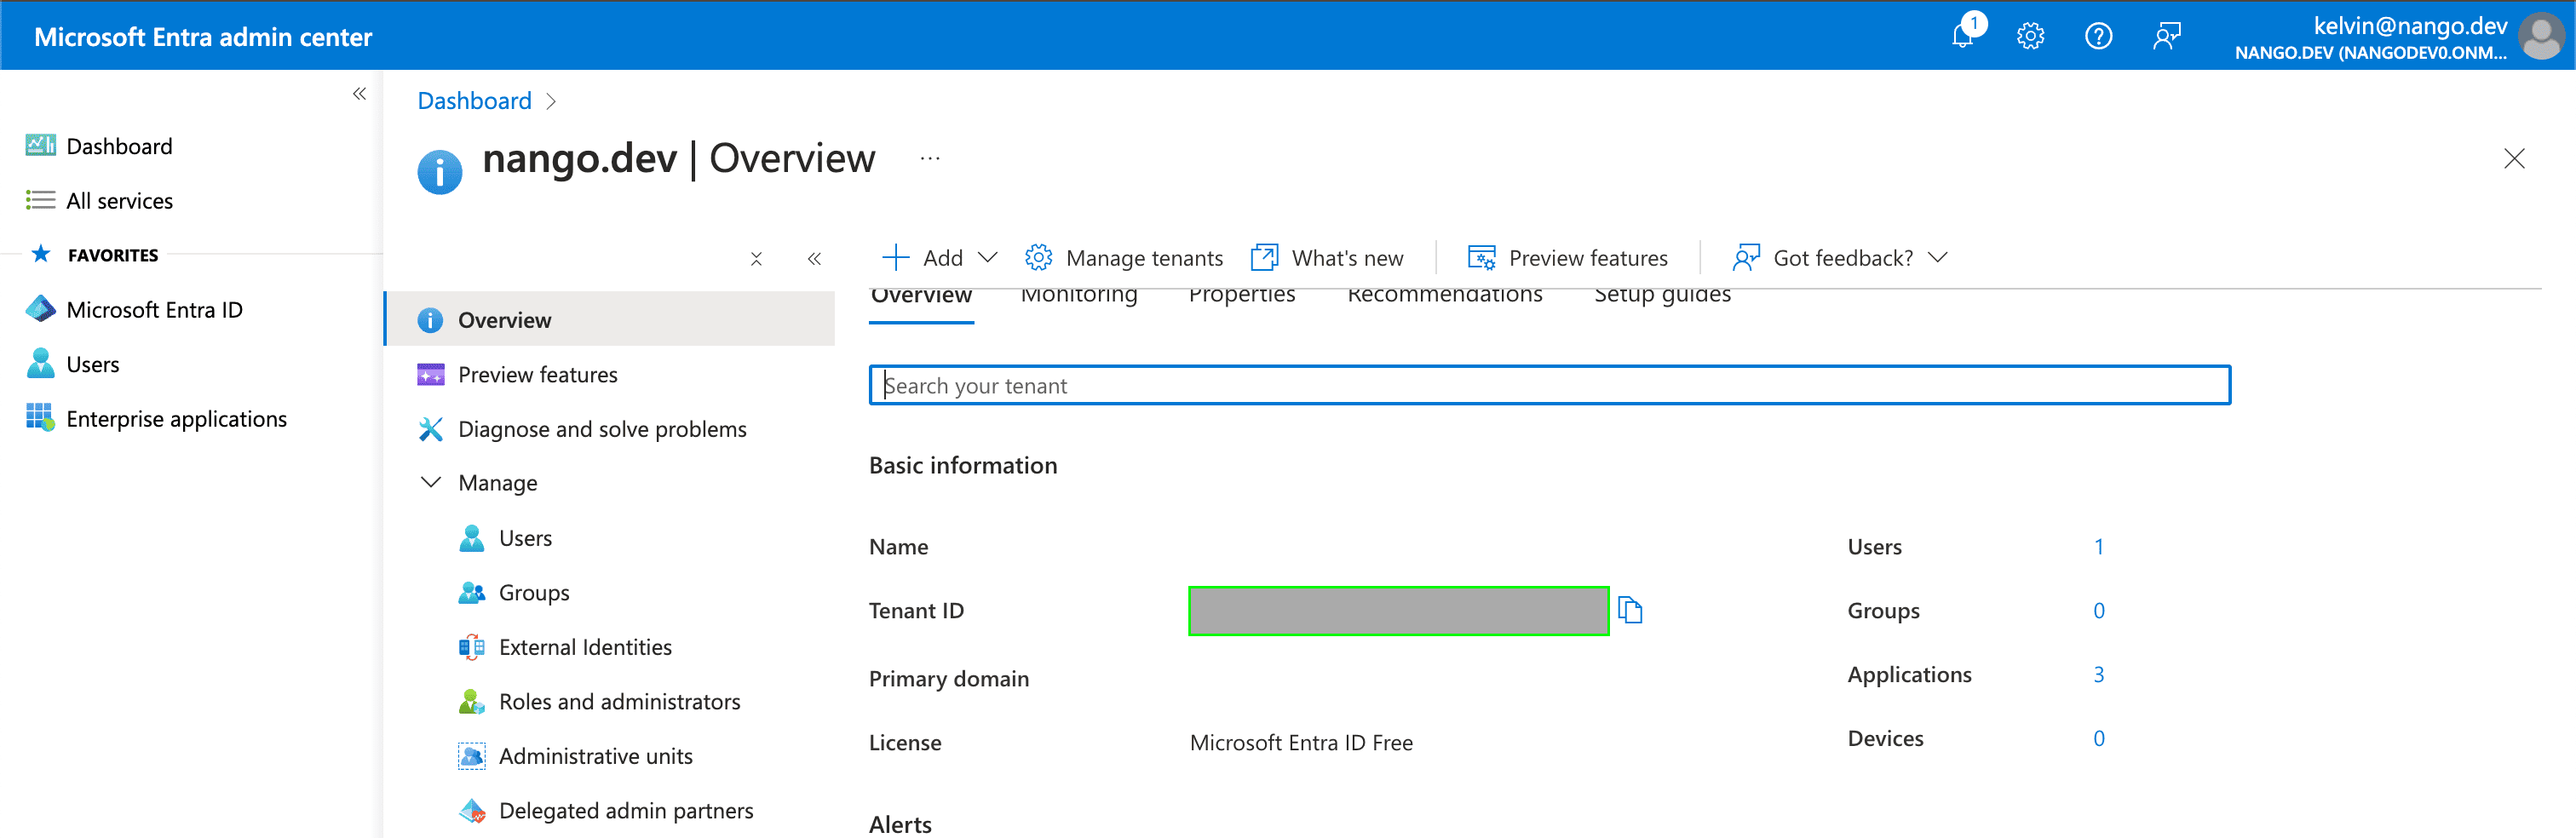
1. Your Tenant ID can be found in the **Tenant ID** field on the [Overview page](https://aad.portal.azure.com/#view/Microsoft_AAD_IAM/ActiveDirectoryMenuBlade/~/Overview) within your Azure account.
 ### Step 2: Generating your Client ID
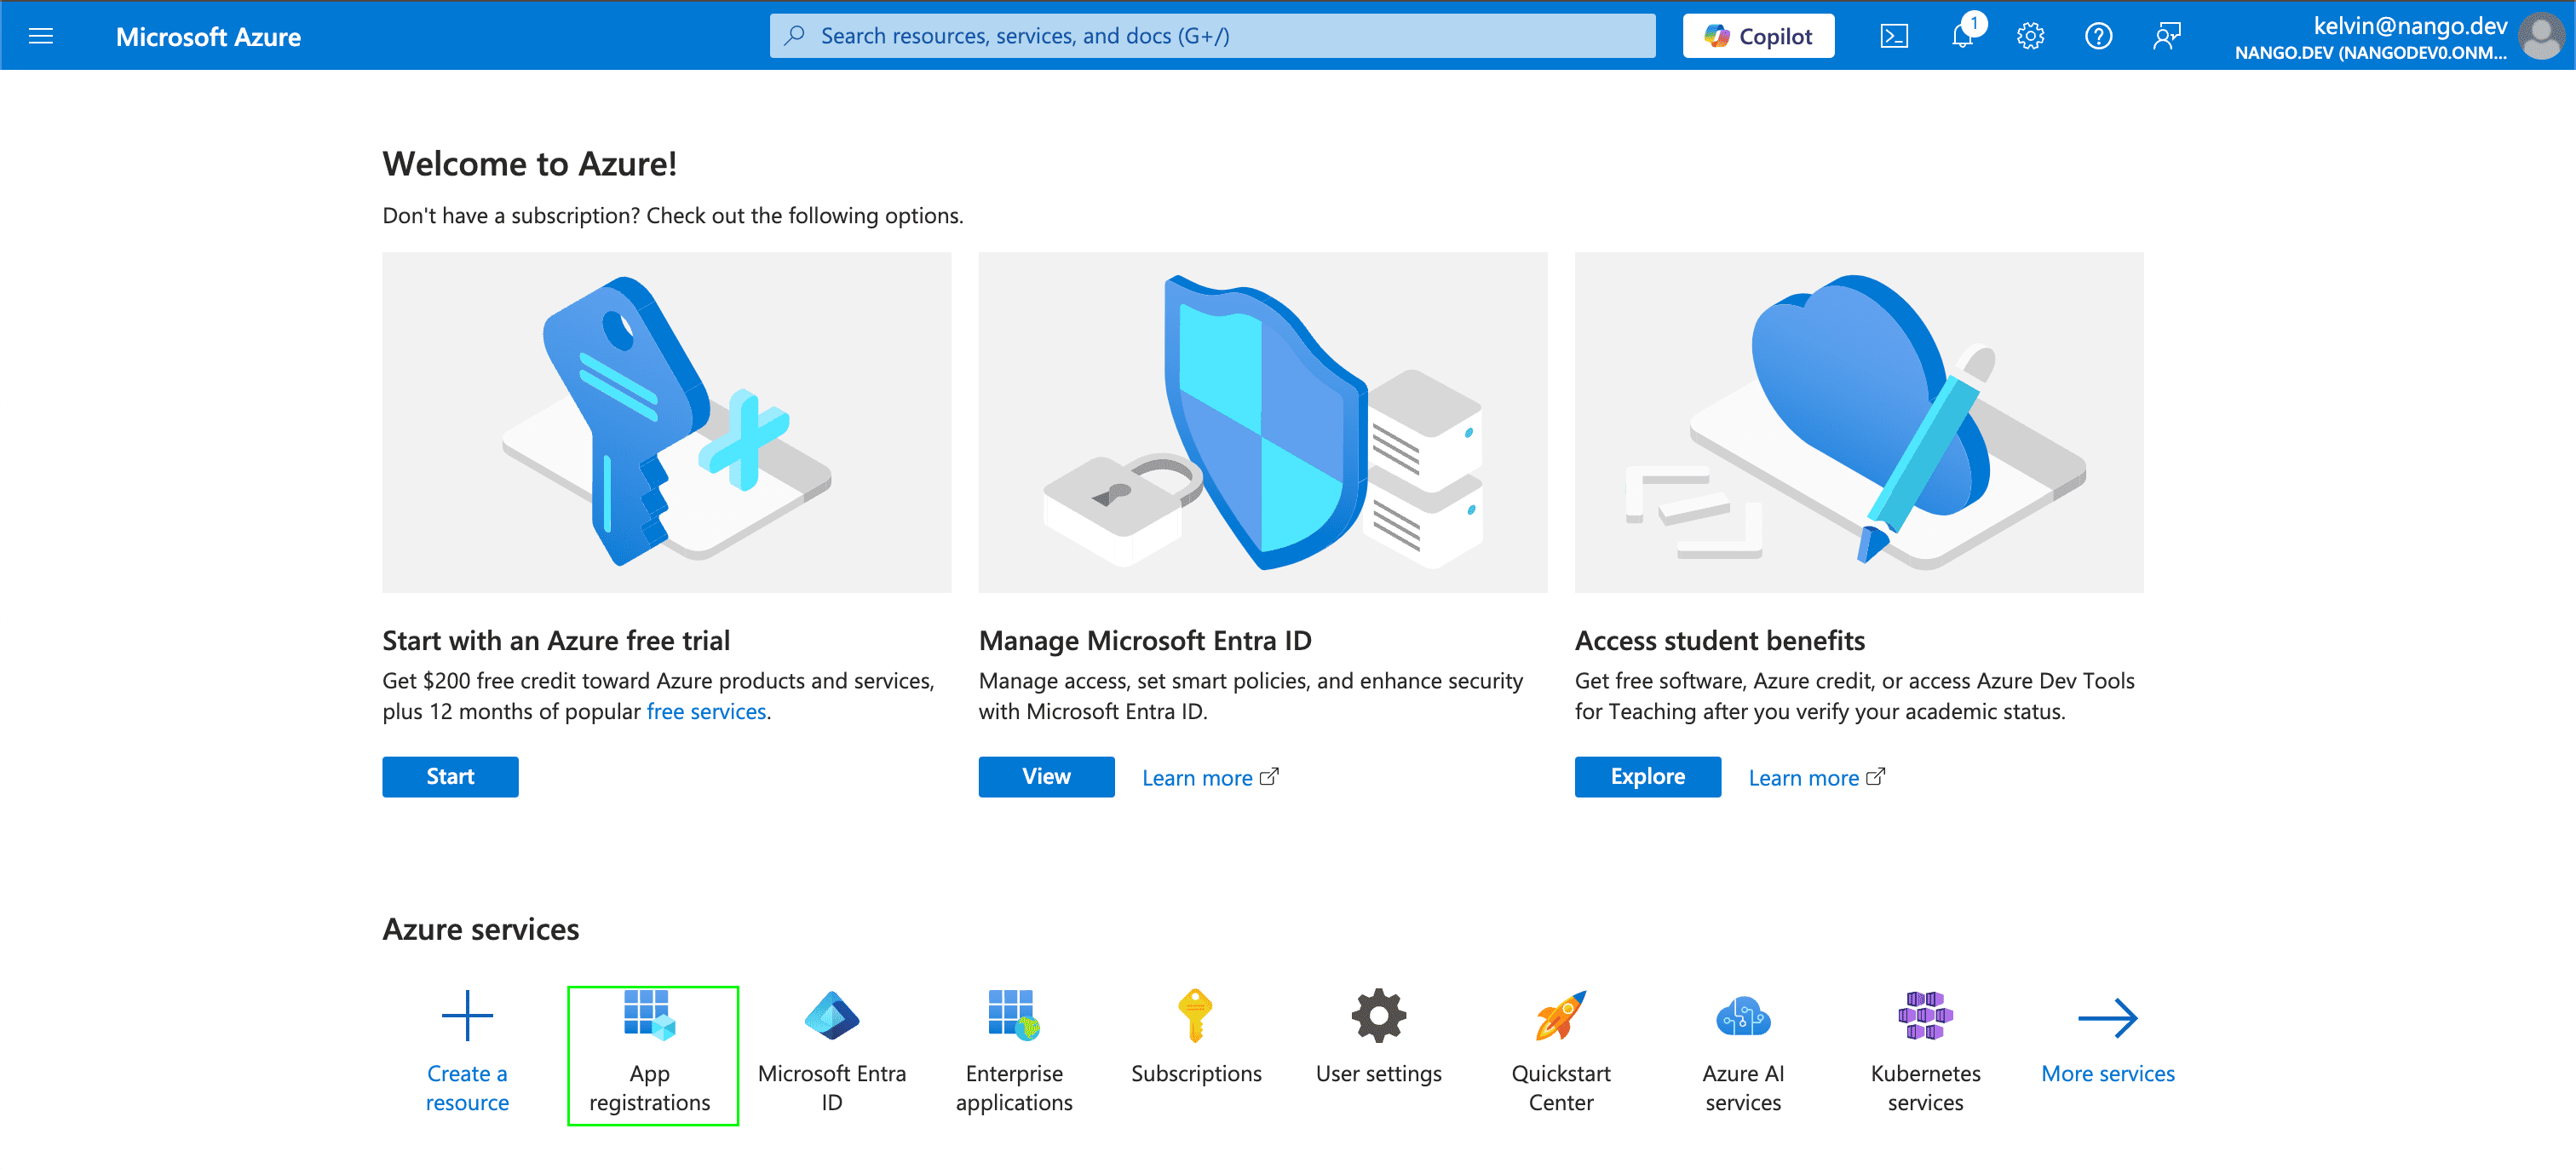
1. Navigate to the [Azure portal home page](https://portal.azure.com/#home) and sign in using the credentials of an administrator.
2. Select **App registrations**.
### Step 2: Generating your Client ID
1. Navigate to the [Azure portal home page](https://portal.azure.com/#home) and sign in using the credentials of an administrator.
2. Select **App registrations**.
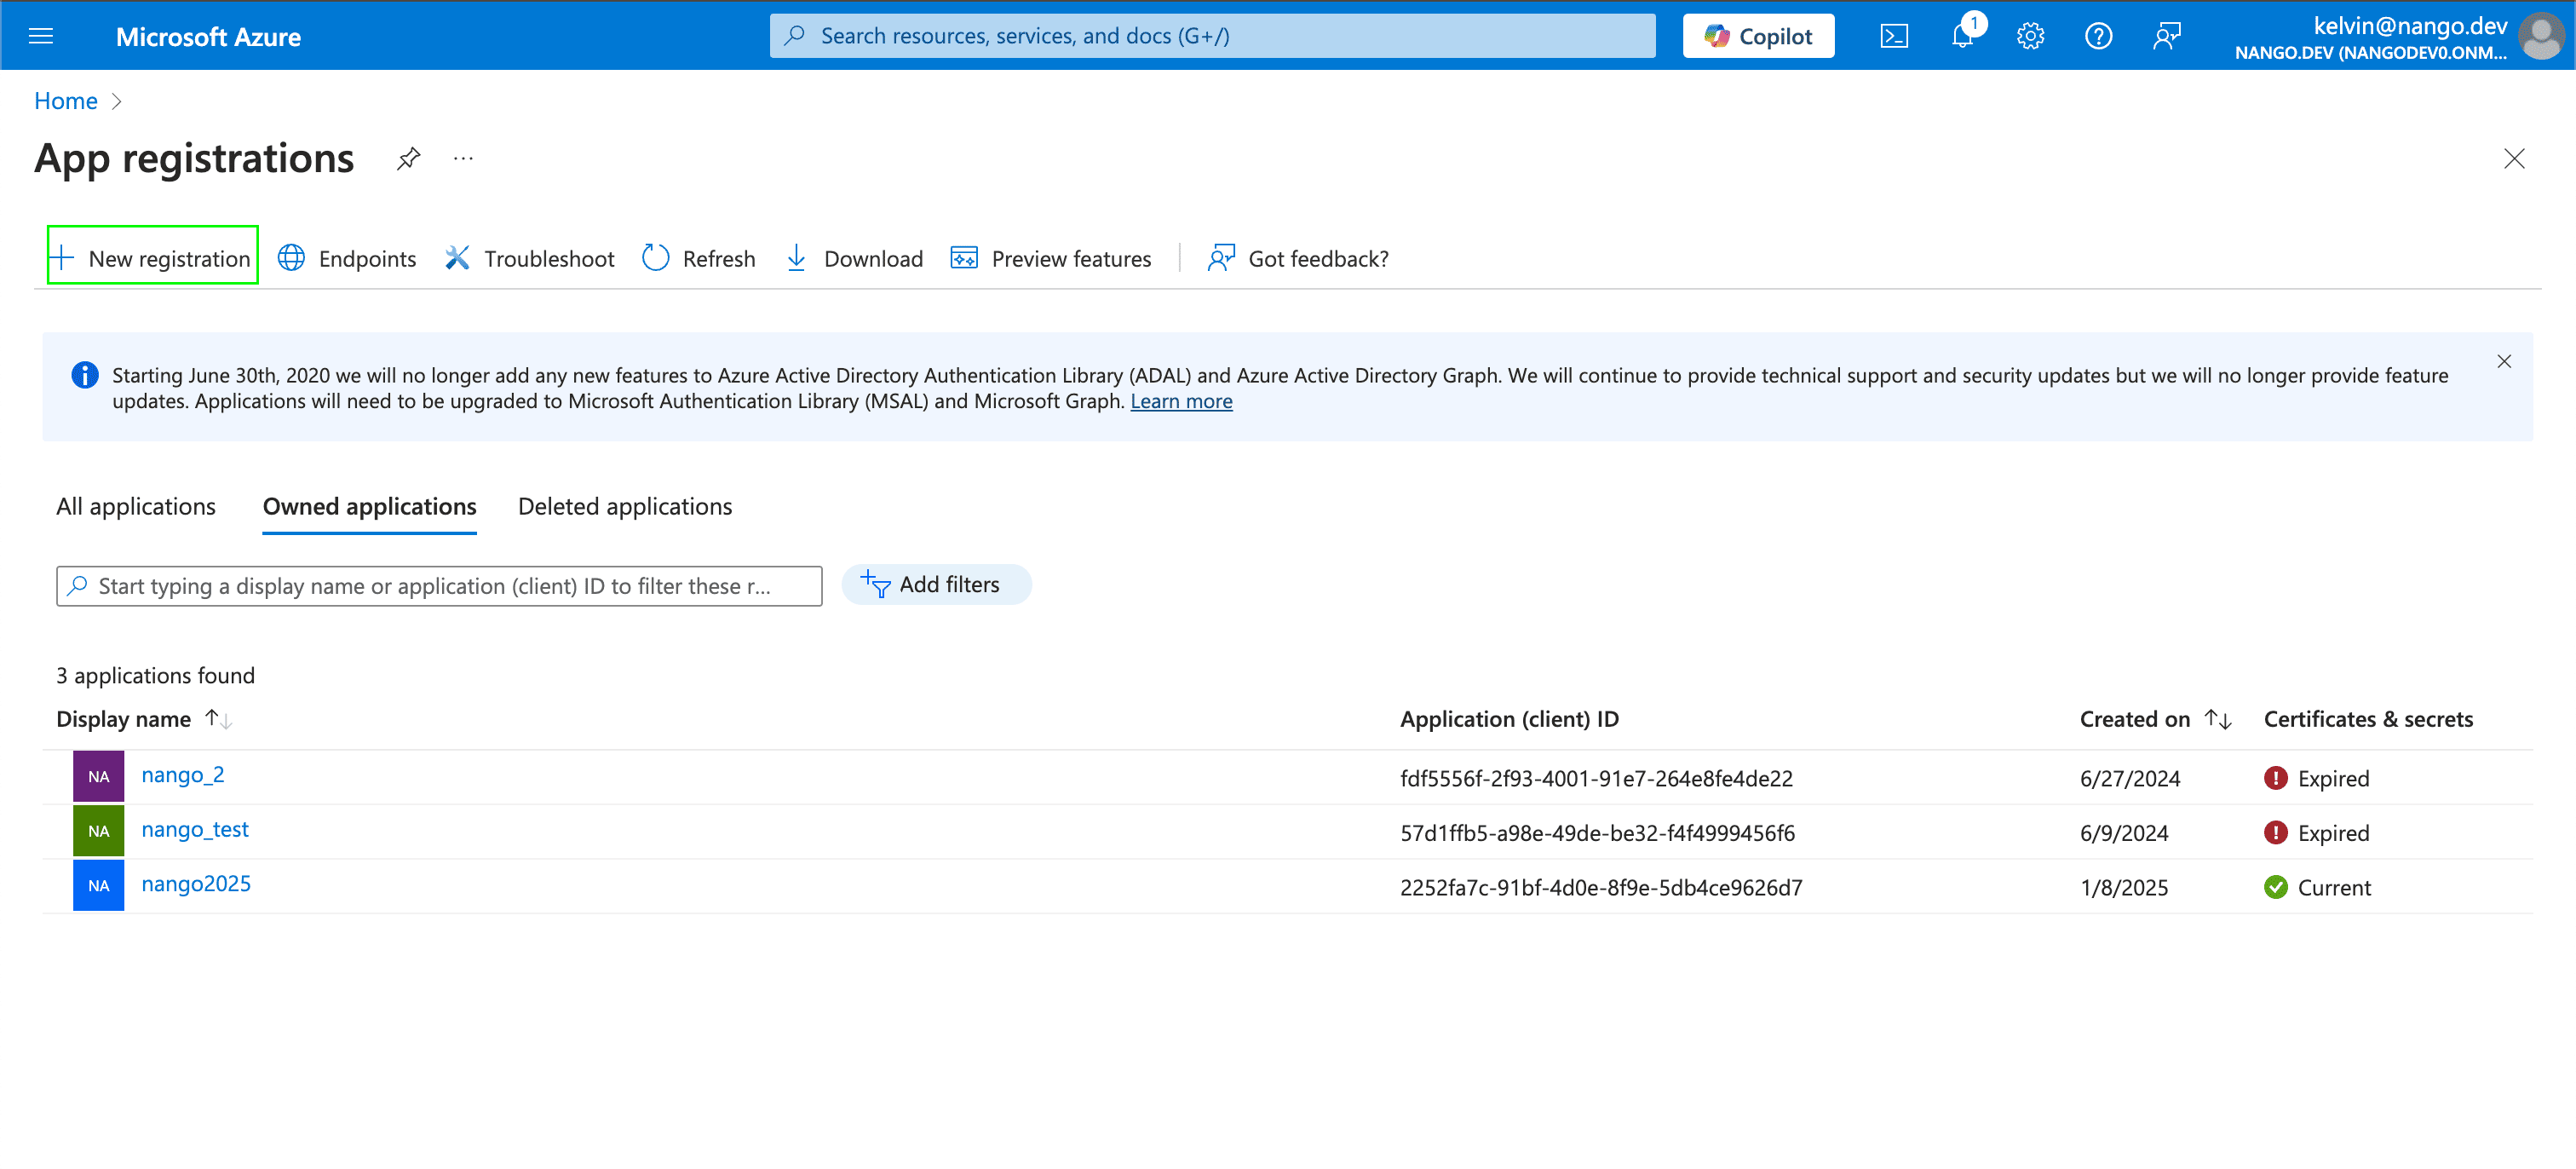
 3. Select **New registration**.
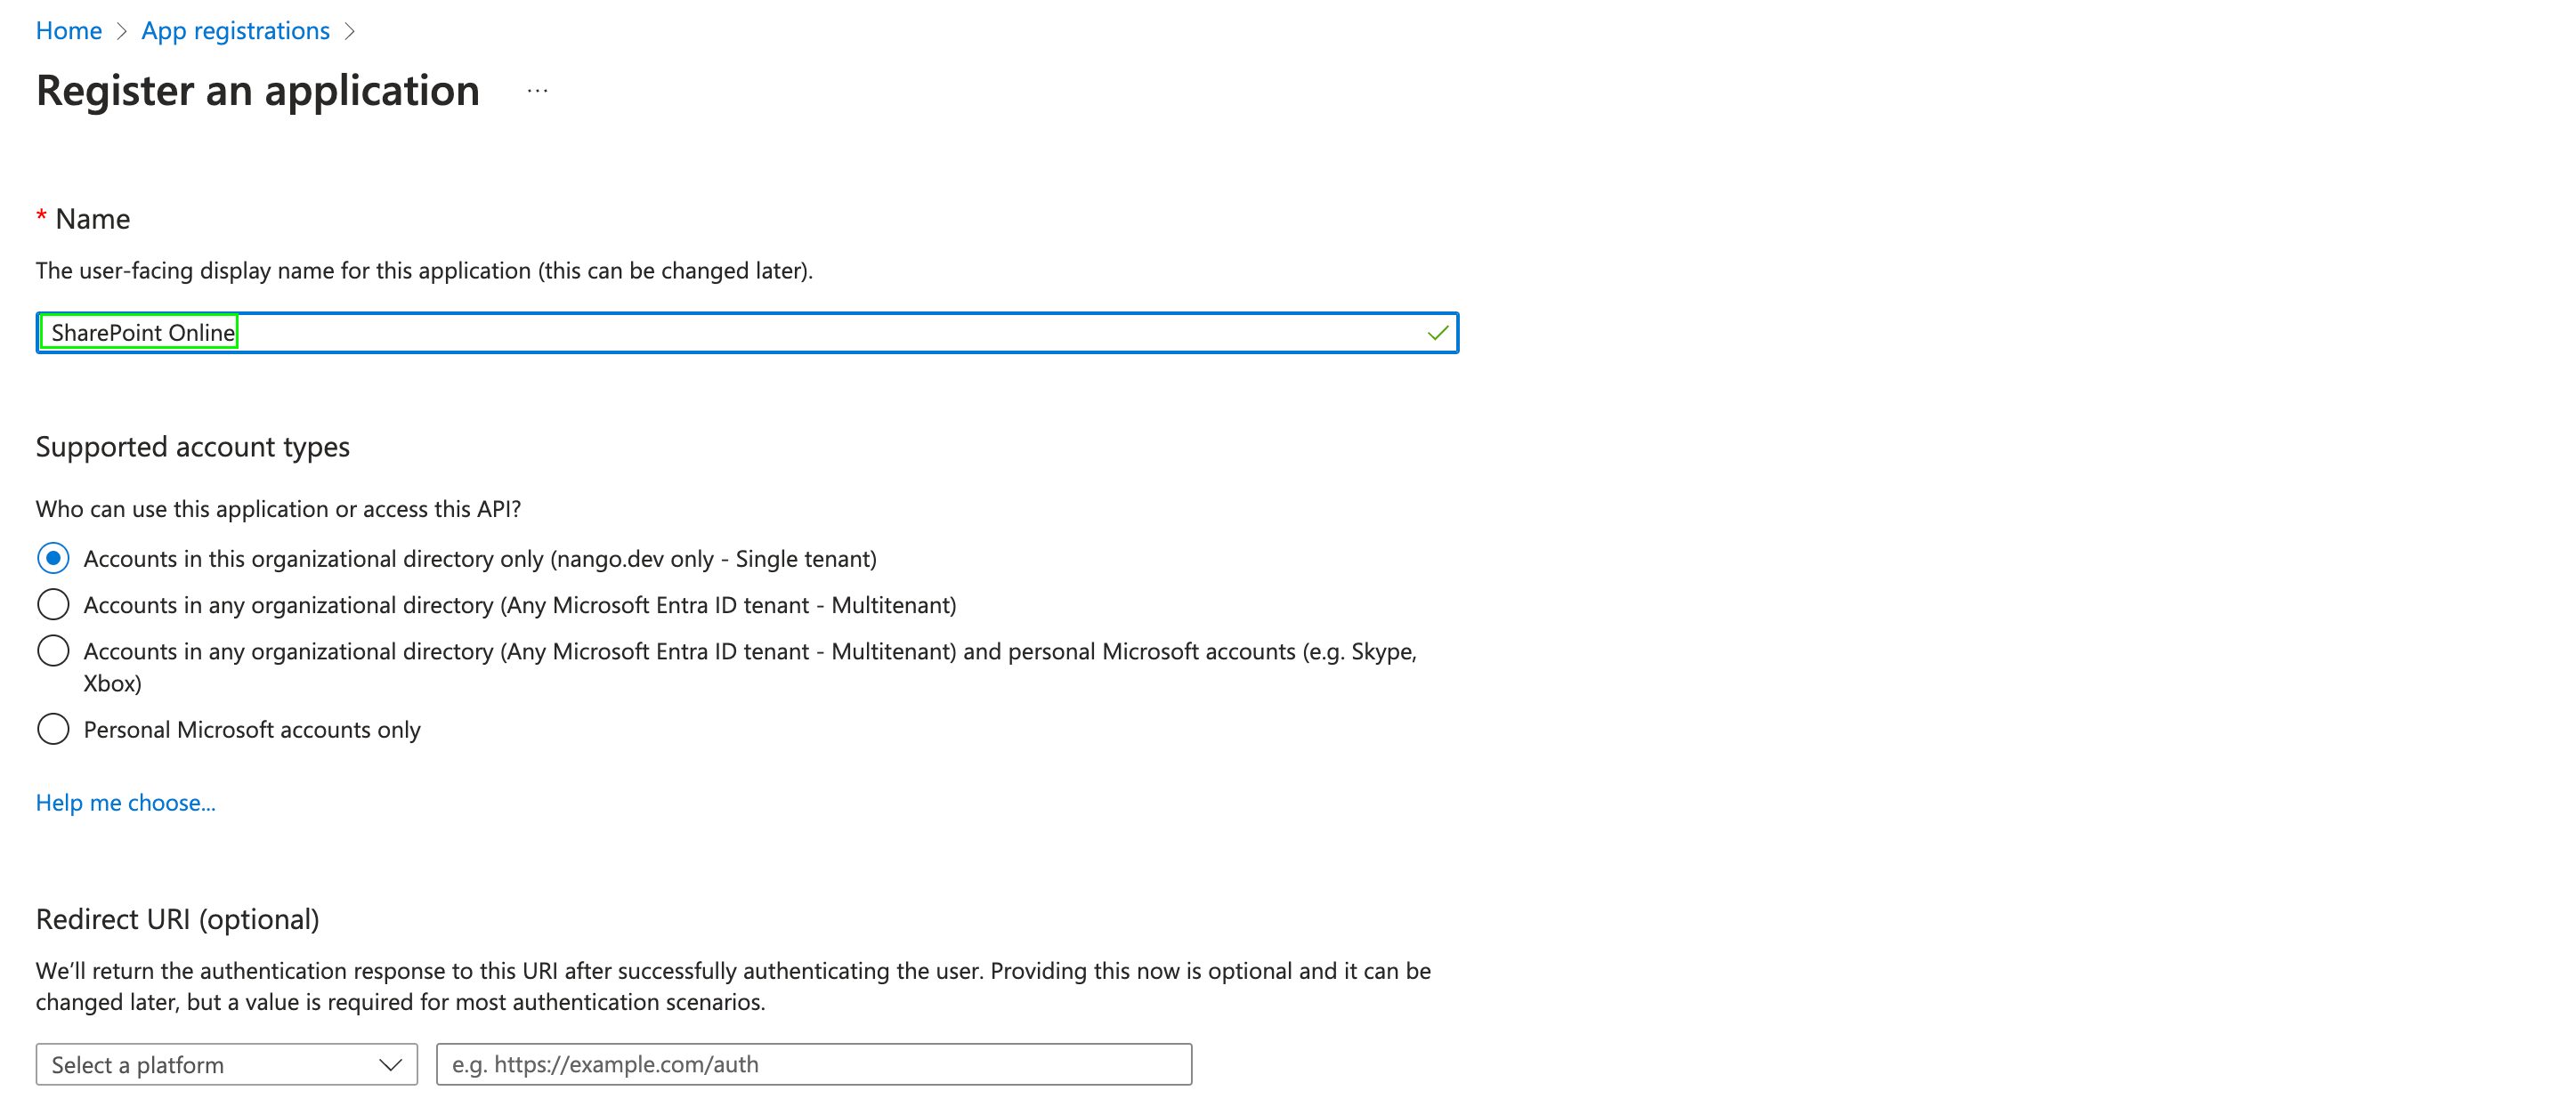
 4. In the **Register an application** section, enter a meaningful application name to display to users. Select who can use this application based on your environment and click **Register**.
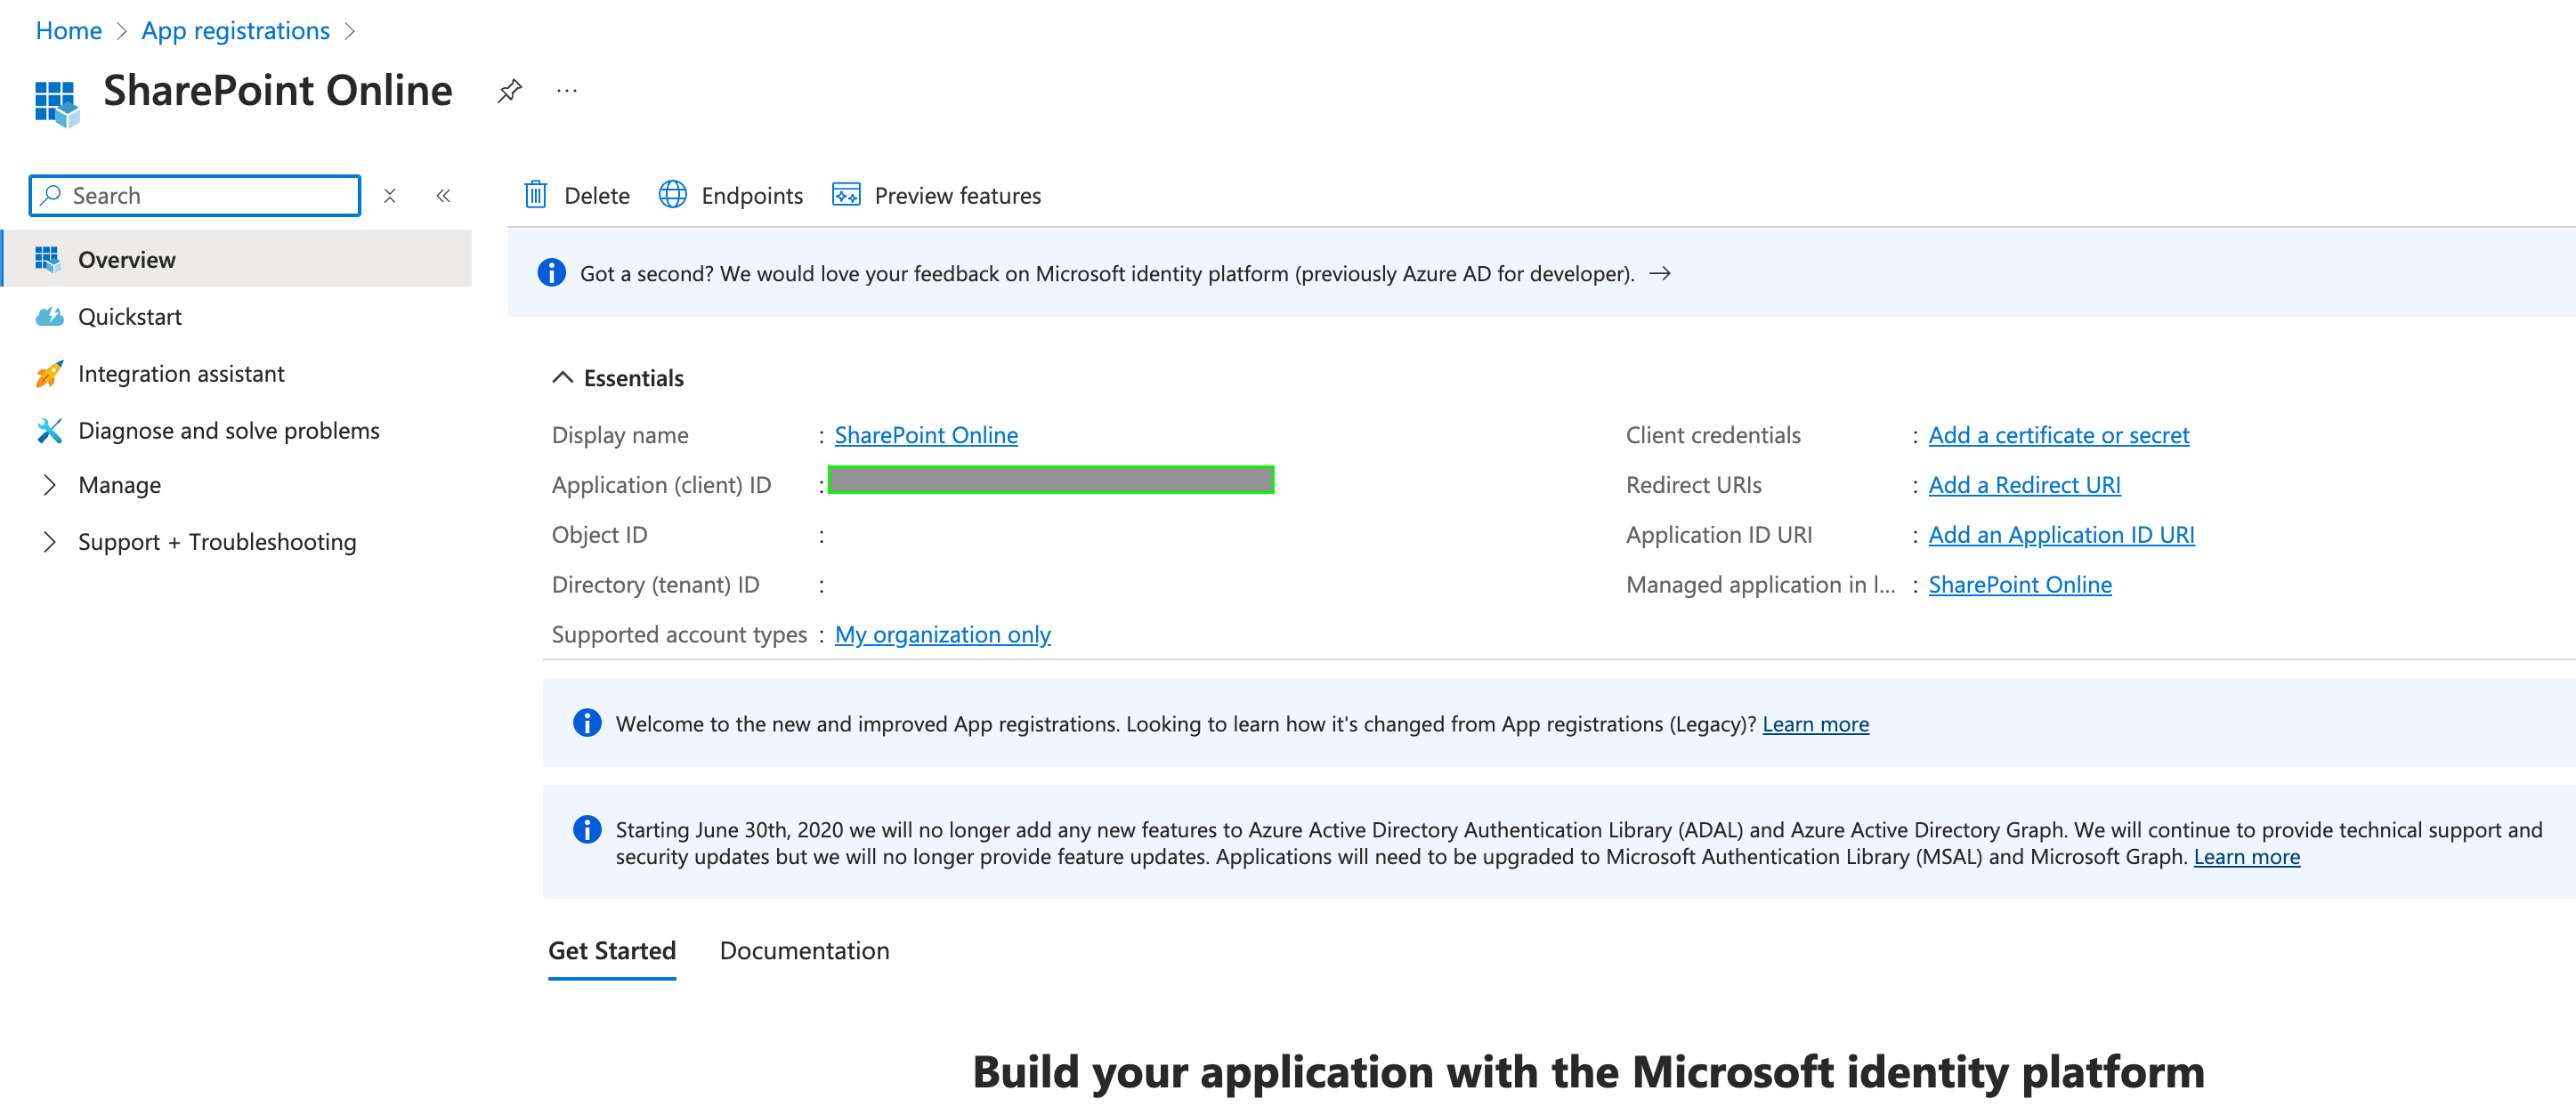
 5. Once you have registered your application, your **Client ID** will be displayed in the **Application (client) ID** field within the **Essentials**.
 ### Step 3: Generating your Client Secret
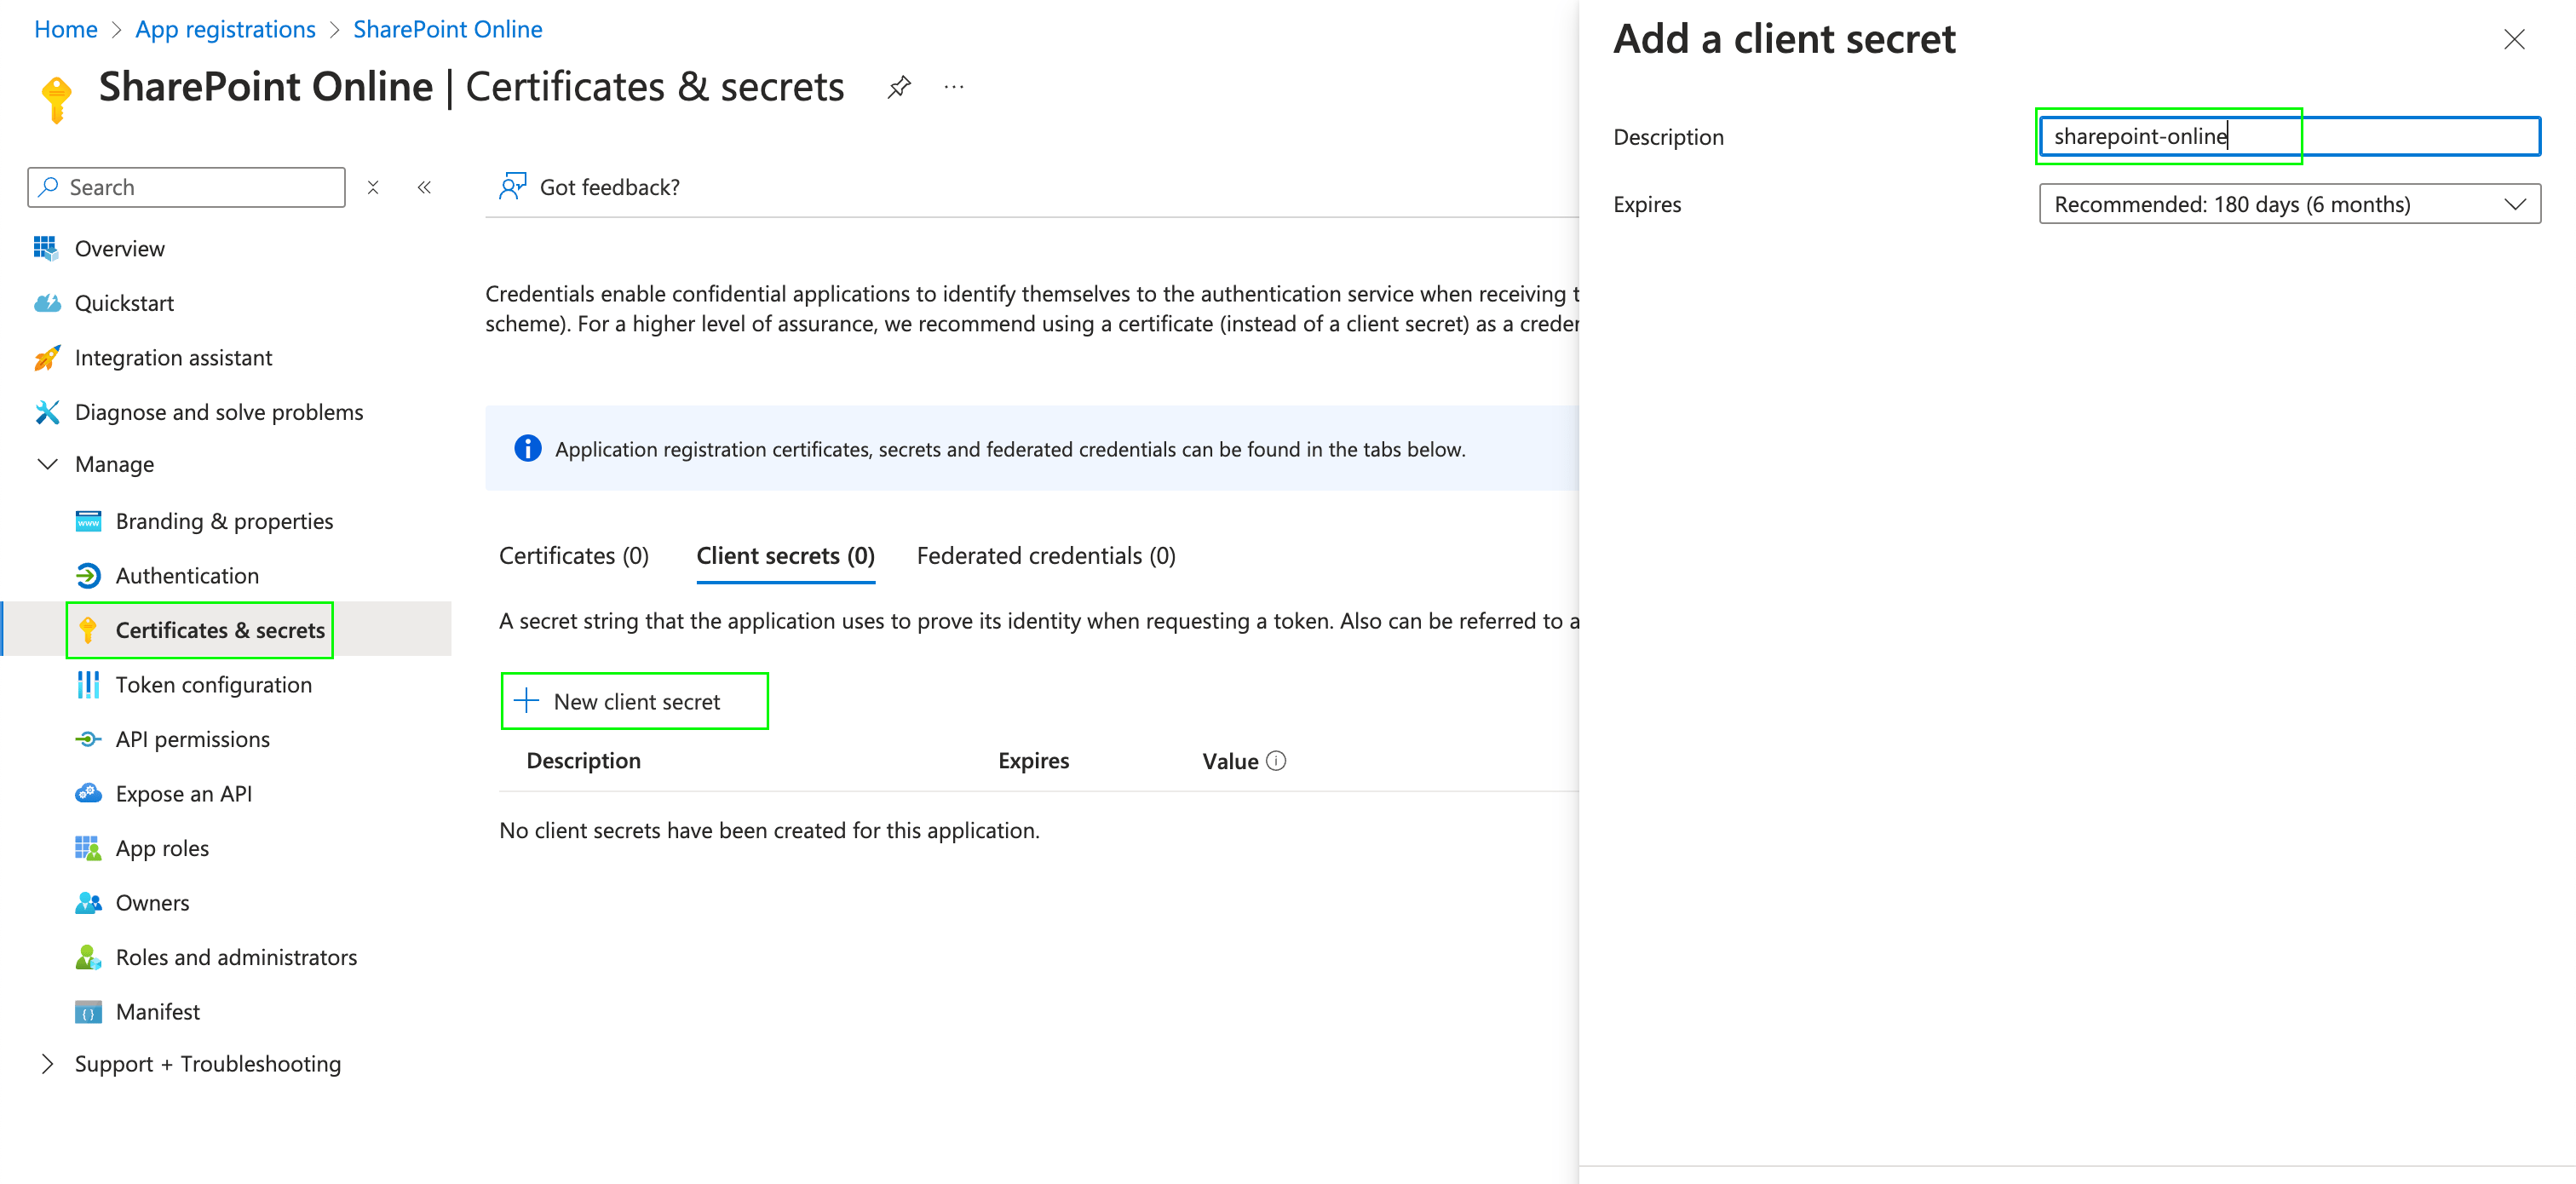
1. After registering a new app in the [step above](#step-2-generating-your-client-id), navigate to **Certificates & secrets** under **Manage**, and click **New client secret**.
2. A pop-up modal will appear, prompting you to enter your secret's **Description** and **Expires** values. Fill these then click on **Add**.
### Step 3: Generating your Client Secret
1. After registering a new app in the [step above](#step-2-generating-your-client-id), navigate to **Certificates & secrets** under **Manage**, and click **New client secret**.
2. A pop-up modal will appear, prompting you to enter your secret's **Description** and **Expires** values. Fill these then click on **Add**.
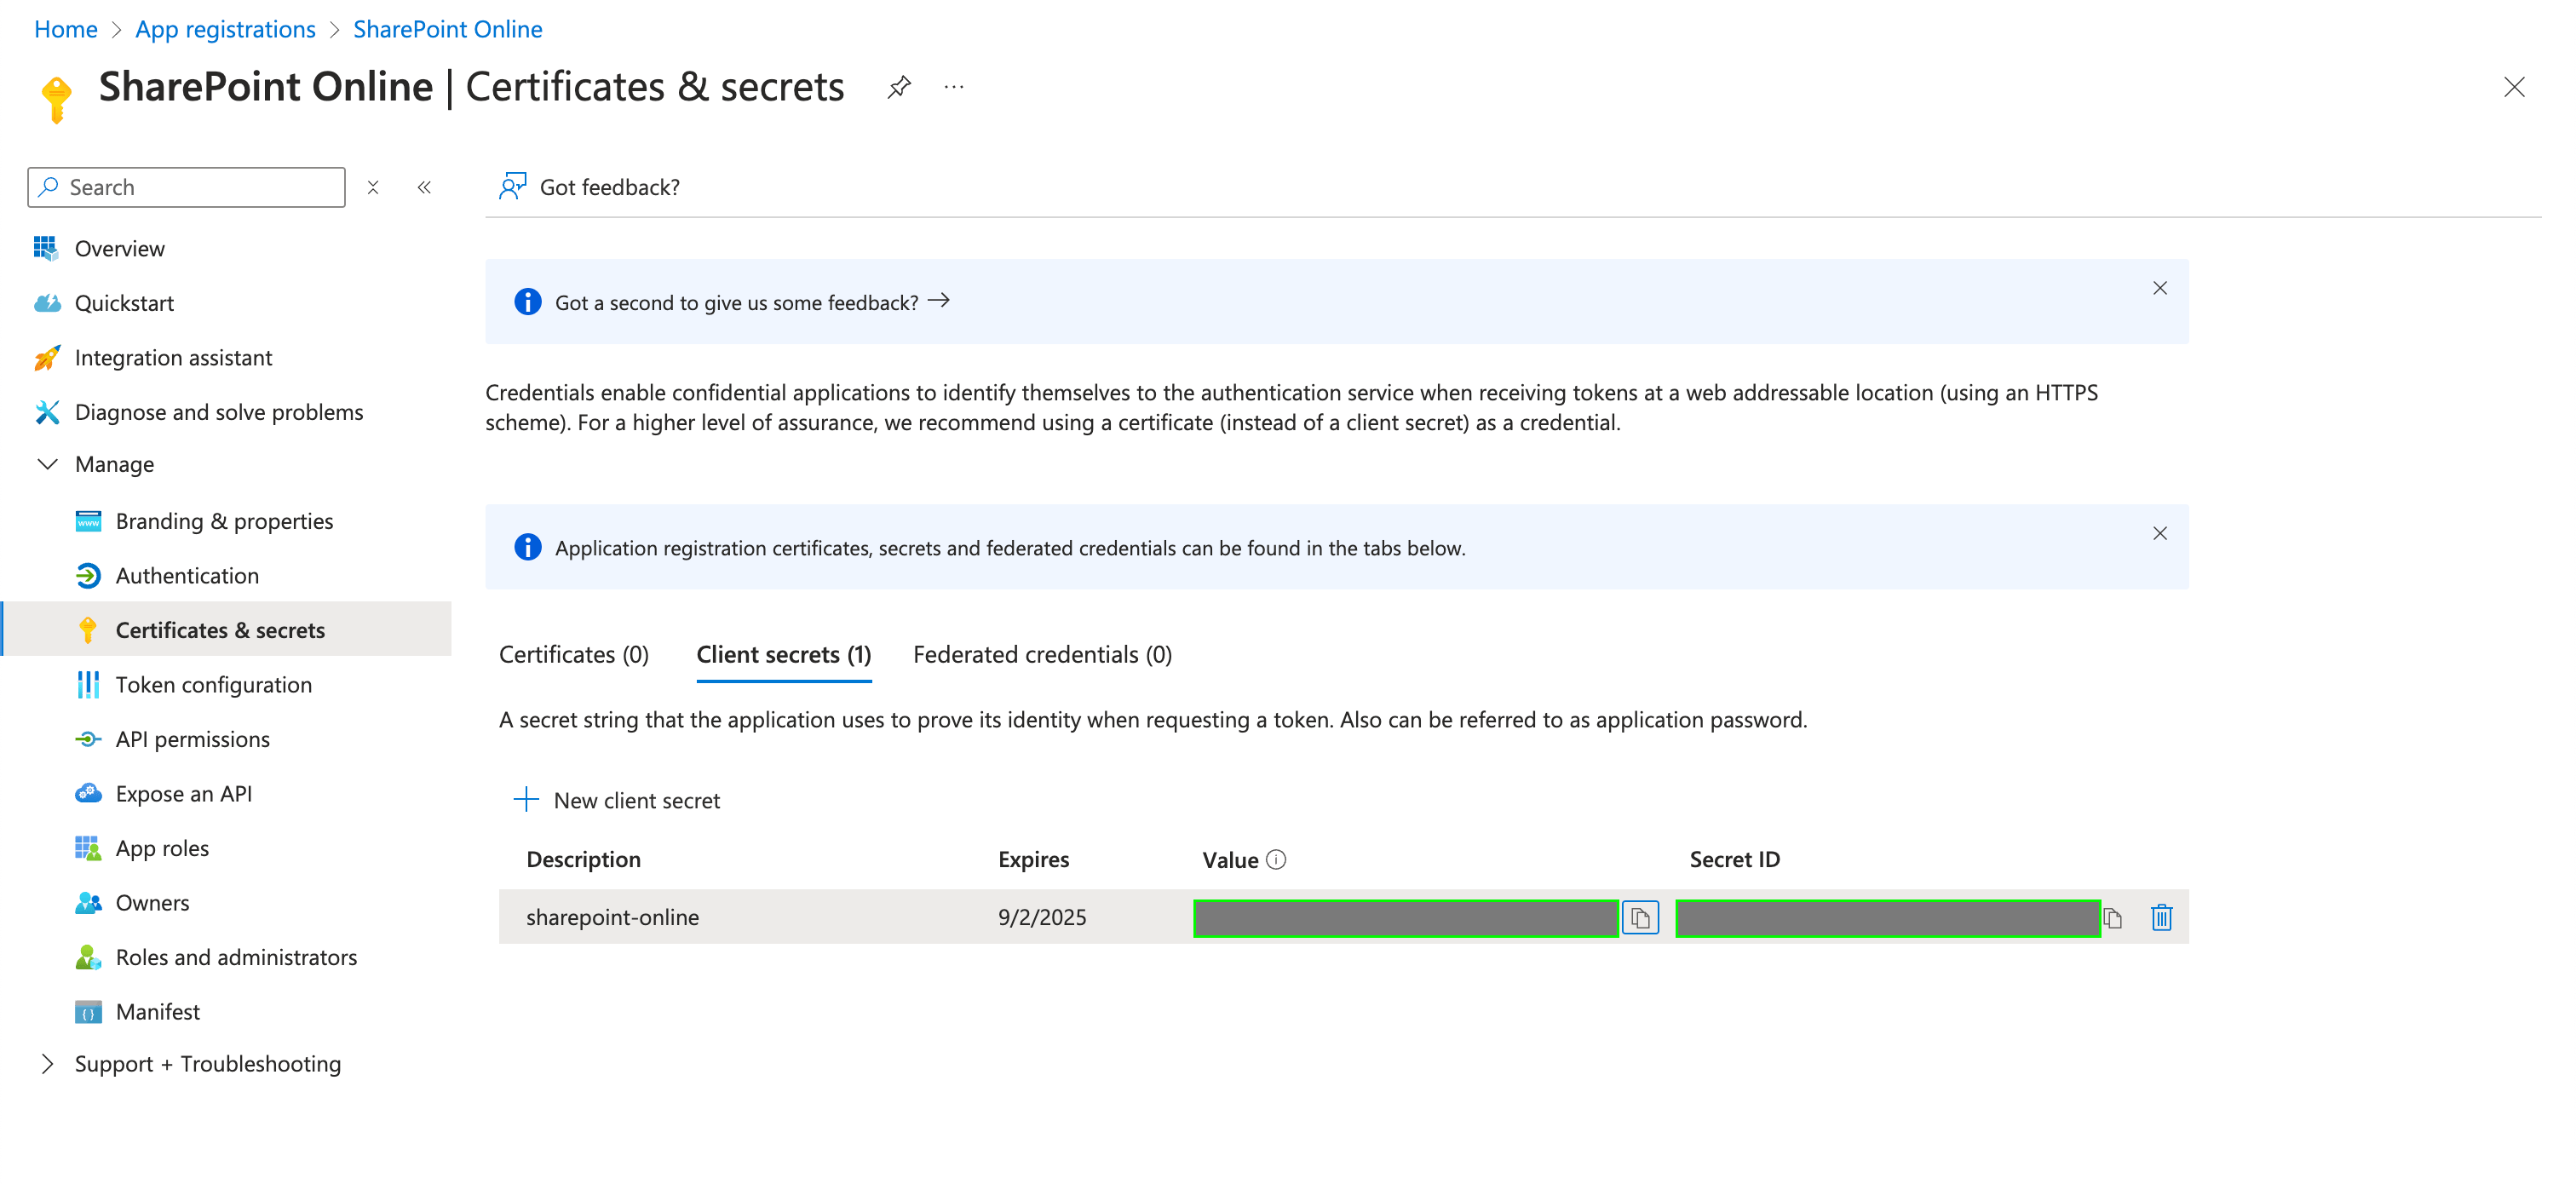
 3. Once completed, your **Client Secret** will be generated. This value can be found in the **Value** field within the **Client Secrets** table.
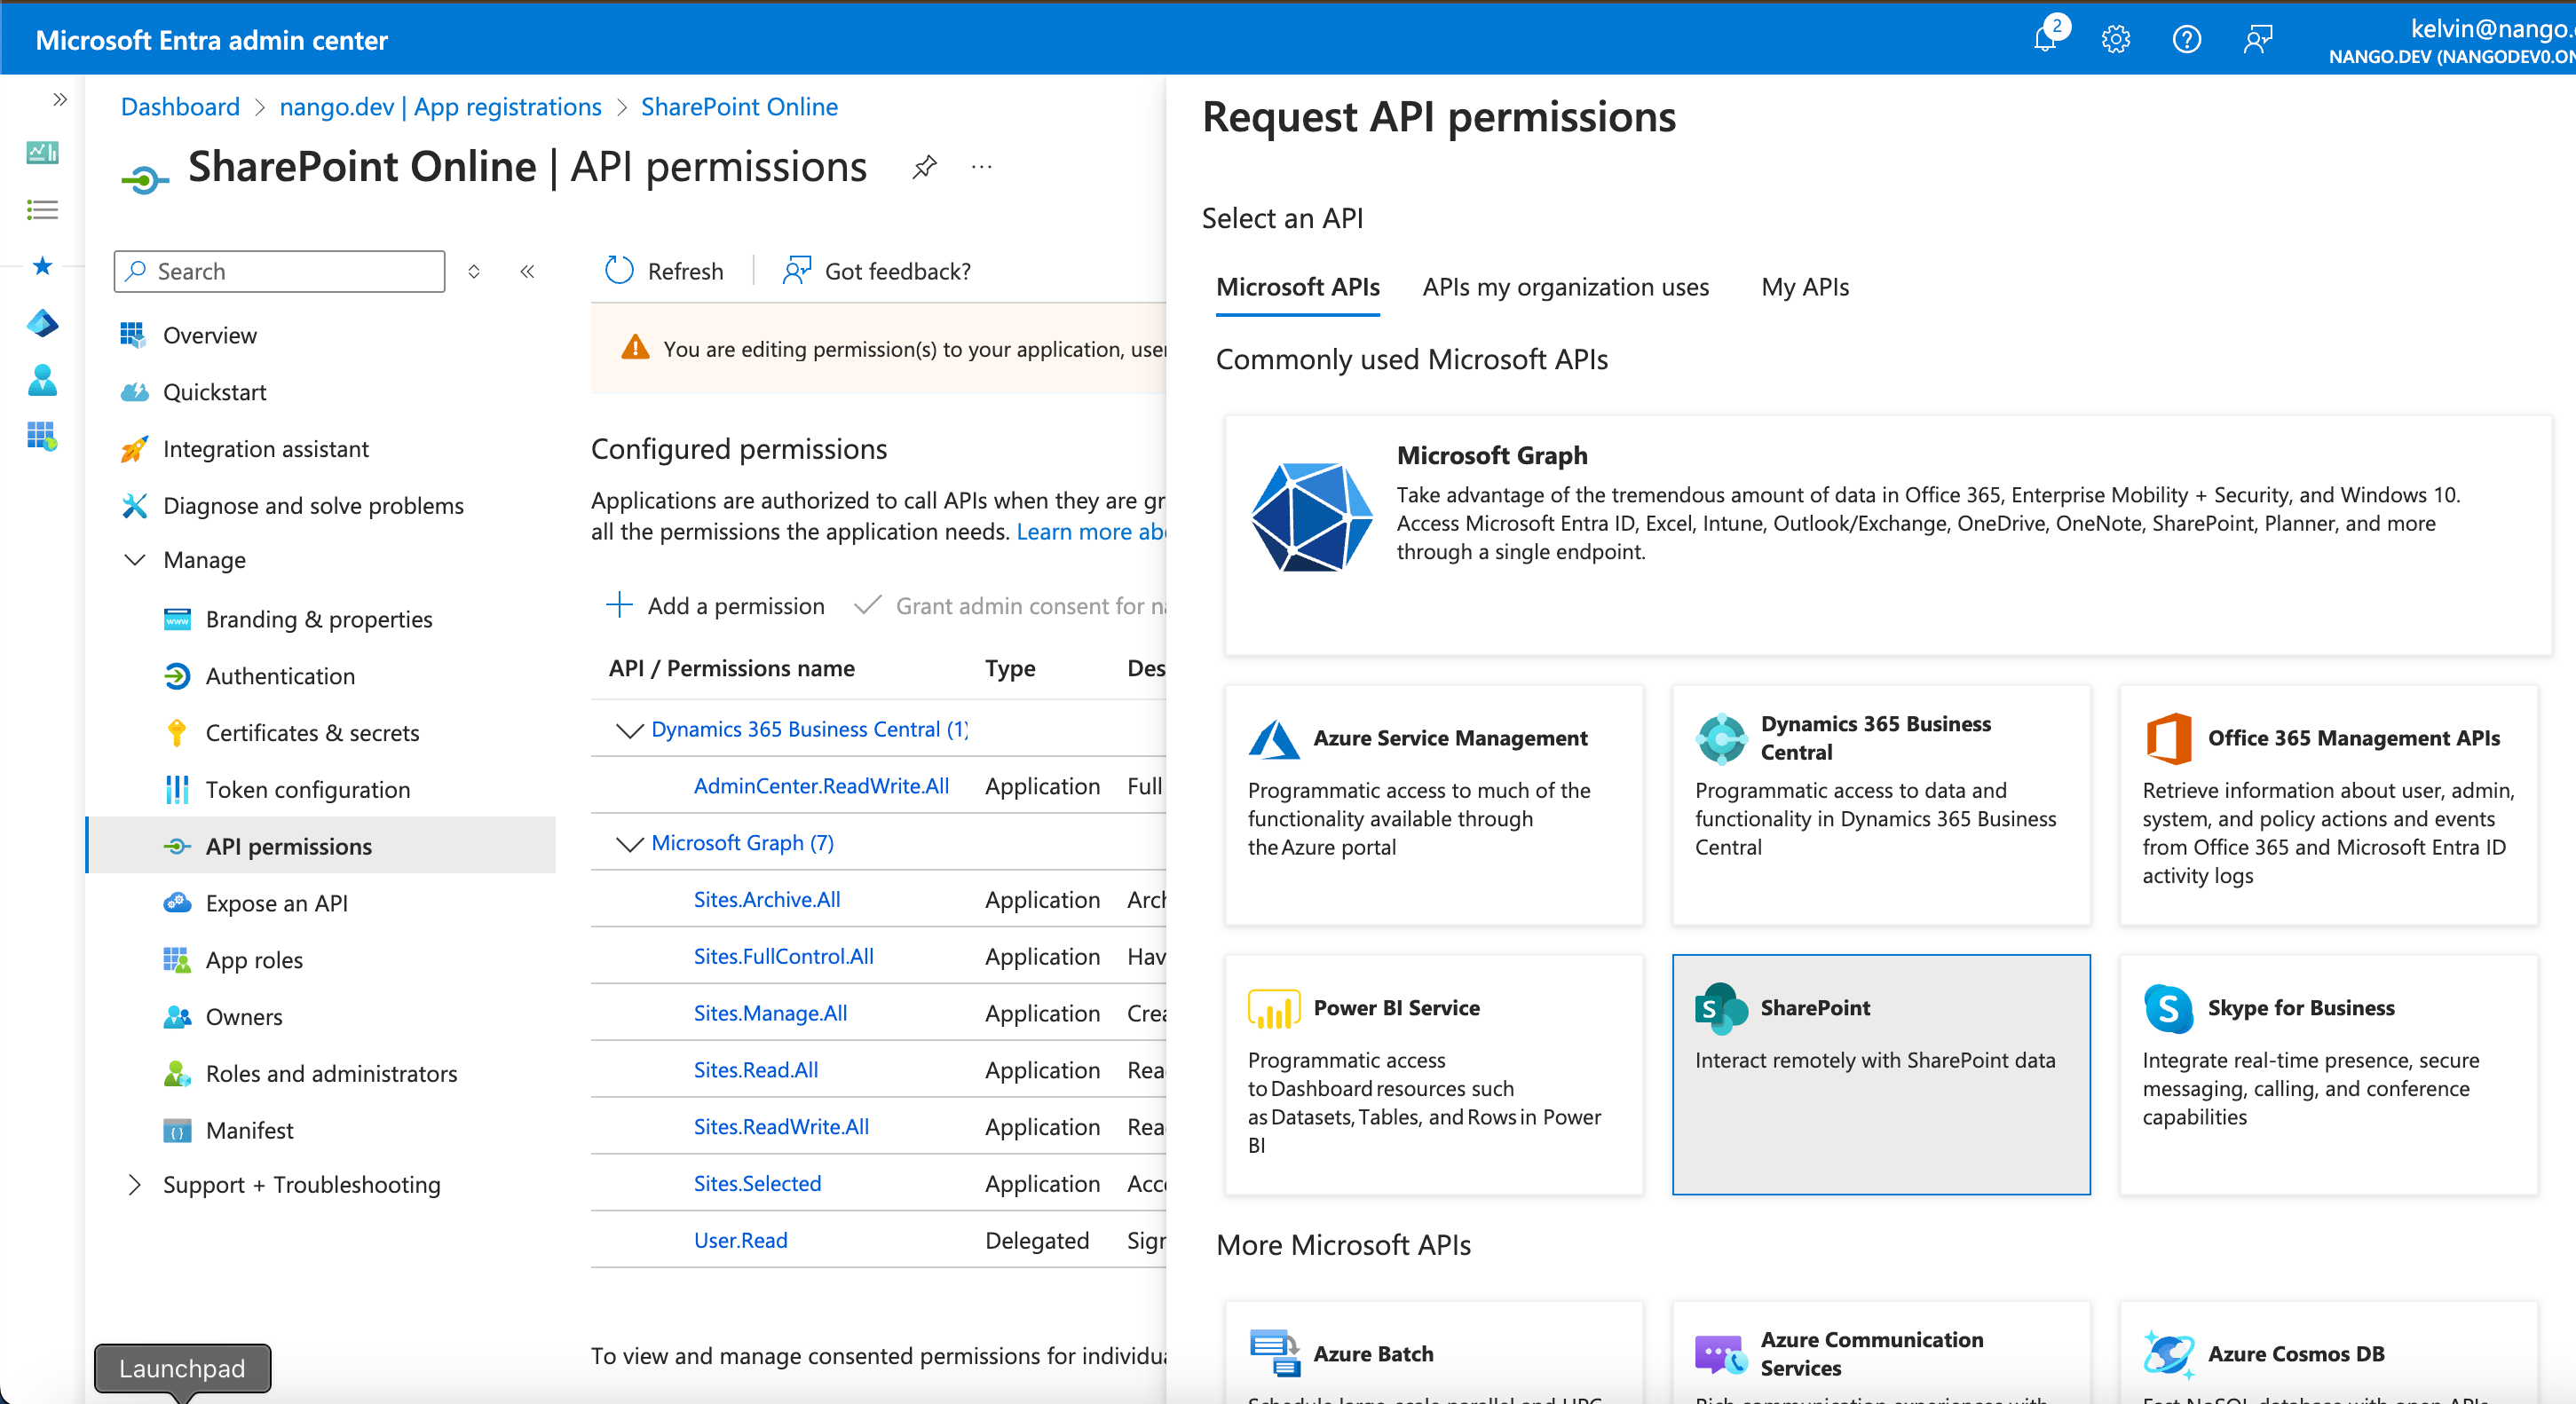
 4. After generating the **Client Secret**, you must grant the registered application the necessary permissions. Navigate to **API permissions**, select **Add a permission**, and choose **Microsoft Graph**.
5. From the displayed list, choose **Application permissions**, select the required permissions, and click **Add permissions**.
4. After generating the **Client Secret**, you must grant the registered application the necessary permissions. Navigate to **API permissions**, select **Add a permission**, and choose **Microsoft Graph**.
5. From the displayed list, choose **Application permissions**, select the required permissions, and click **Add permissions**.
 ### Step 4: Enter credentials in the Connect UI
Once you have your credentials:
1. Open the form where you need to authenticate with Microsoft (Client Credentials).
2. Enter the **Tenant ID**, **Client ID**, and **Client Secret** in their designated fields.
3. Submit the form, and you should be successfully authenticated.
### Step 4: Enter credentials in the Connect UI
Once you have your credentials:
1. Open the form where you need to authenticate with Microsoft (Client Credentials).
2. Enter the **Tenant ID**, **Client ID**, and **Client Secret** in their designated fields.
3. Submit the form, and you should be successfully authenticated.
 You are now connected to Microsoft (Client Credentials).